Wednesday, 8 July 2009

Argentine Empanadas

So I'm completely in love with making my own dough lately. It all started with the Chinese dumplings, then it moved to Southern biscuits... but now I'm on the empanadas hard. Here's the recipe I used for my latest batch, which had spicy beef picadillo, potatoes, and goat cheese (amongst other things). In all, it takes a few hours, but you get a bunch of them and if you tag-team with someone else, I'm sure it would go much faster. You can use almost whatever you want in empanadas... Argentine food is famous for its Italian influences, but you can pretty much put anything you like inside these delicious little pastry packets. I made some vegetarian ones with Italian vegetables, and I plan to make some with chorizo and potatoes soon.

Dough:

1.5 C All-Purpose Flour
4 tbs fat (I used all butter in one batch, half lard/half butter in another)
1 egg yolk
1/2 tsp salt (I used Kosher)
~3/4 C milk

The easiest way to do this is in a food processor -- just pulse the flour and the fat together until it looks like cornmeal.. if you've made biscuits or pie crust, you're familiar with this. Add the egg yolk and a bit of milk then pulse to combine. Keep adding milk in small increments while pulsing until the dough begins to pull away. Once it will hold together when you lightly knead it, it's ready to go. Form the dough into 2 or 3 thick discs and chill in the fridge for 30 minutes or until you need it. Cover it with plastic wrap or in a covered container if you plan to leave it for longer than a few hours though.

Note on this recipe: normally empanada dough doesn't have milk in it, but apparently they make them this way in the Mendoza region of Argentina and it makes a fluffier final product. I decided to try it out and really liked the texture. You could also use water, which I might do for my next batch to see if I can get some fairly crispy as a change of pace.

Roll out the dough as thinly as you can (right before it's transparent, about 1 mm) and cut out rounds with the instrument of your choice. I used an oatmeal canister top, but it just depends on what size you want. Re-roll the scraps until you have one final awkward looking one remaining, which you will eat as soon as it comes out of the oven. Chill the dough rounds until ready to use.. sooner the better though, as you don't want it to get dry.

Filling:

1 lb ground beef
2 white onions, diced finely
1 bunch green onions
4 potatoes, peeled then boiled in salted water until fork tender
3-4 garlic cloves, minced
2 tbs ground chile powder (chile molido)
1 tbs cumin, preferably whole toasted and then ground
Fresh oregano and cilantro, chopped
Smoked paprika to taste (if you have it.. I didn't, unfortunately)
Salt/Black pepper

Cook the onions until translucent over medium heat (salt them to facilitate sweating), then add the beef, smashing/stirring it with a spatula to break it in to small pieces. Add the garlic when the beef is about halfway done to prevent burning, then add the spices and finish cooking the beef. Remove the beef mixture with a slotted spoon and combine with the potatoes, which should be diced up small and then mashed in with the beef. Add diced green onions, cilantro, and oregano (to taste). Put everything in the fridge to chill after tasting for spice levels (I added more salt due to the potatoes and also some extra chile molido).

Assembly:

Spoon a medium spoonful of filling into the center of your dough. I made this batch with goat cheese stuffed inside, so I did about 50% here with the goat cheese loaded in the spoonful:
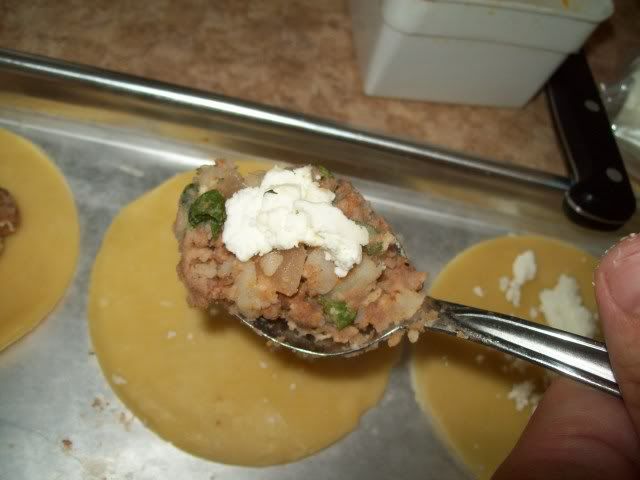

Then topped it off with a packed disc of filling to prevent the cheese from oozing all over the place:
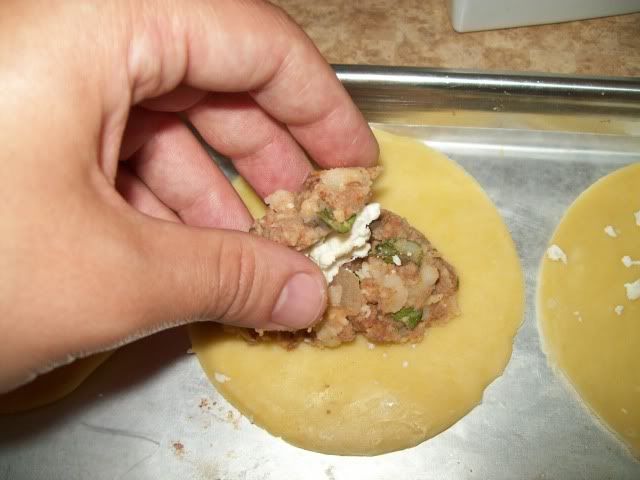

Now here's the fun part. I made an exceedingly crappy video trying to show my technique, but it was tough to do while holding the camera. Anyway, you want to brush the edge of half the dough with egg white, basically pinch together the two ends of the dough (like a taco), then close it up from edge to edge, being careful of filling getting in between the dry dough and the egg white side. Then you should do another seal with the side of your hand as seen here -- this creates a nice bump as well as a bigger rim, making an ornate sealing method easier.


I fold the ends over and then pinch the dough to seal it and make a nice looking empanada -- you could also just use the tines of a fork or fold it.. whatever works and keeps it sealed:


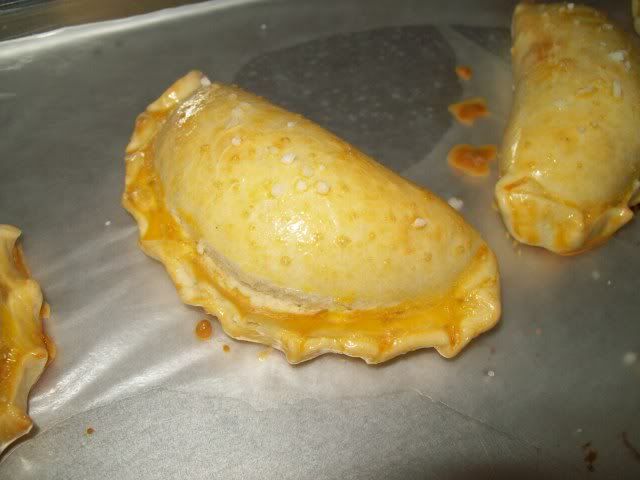
Let the empanadas rest in the fridge for another 30 minutes before baking. Pre-heat your oven to 350 degrees, then brush the empanadas with egg yolk and sprinkle with salt (again, Kosher or sea salt is much better for this kind of thing). I did this on a wax paper lined sheet pan that would be used to bake them as wlel -- parchment paper is probably better, but I didn't have any:


Bake at 350 for approximately 20 minutes. But really, just wait until they're slightly brown and totally firm and you're good to go.. I think mine took 24 minutes. Yummy:

Enjoy with a quick blender chimichurri with whatever fresh herbs you have on hand (basil, parsley, oregano, cilantro all work well), olive oil, vinegar (white or balsamic works), garlic, onions (if desired.. they'll be raw white onions), chile powder, and salt/pepper.
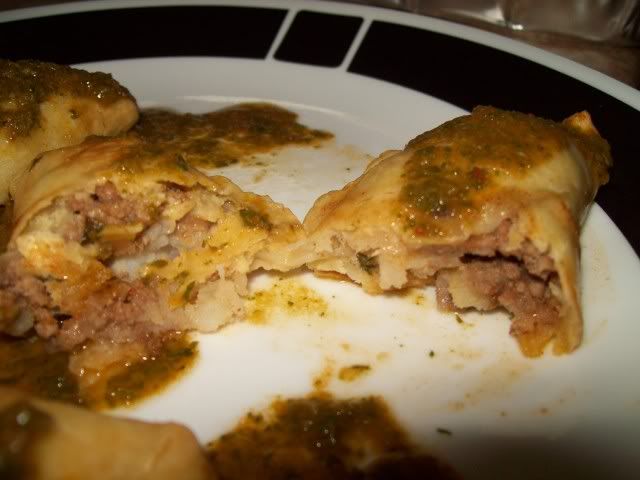


I'll probably post the technique video even though it sucks. Or maybe I'll just make more of these delicious little bastards and shoot another one. Enjoy!

Thursday, 30 April 2009

Best Scrambled Eggs EVA

Scrambled eggs are THE BEST! I always want them for b'fast or after a late night...

Here is an easy recipe for the tastiest scrambled eggs:

- 2 to 3 high quality eggs, preferably local/ organic/ free range
- 1 teaspoon good quality olive oil

If making an even number of eggs, use half whites only and half whole egg. When I make 3 eggs I use 2 whites and one whole.

Crack your eggs in a wide mouth bowl, pour in the olive oil and whisk the crap out of them until frothy- usually two minutes. Make sure the yolk is fully incorporated and there are no blobs of egg white floating around.

Eggs like to be cooked "low n' slow"...so don't use heat above medium-low. Cook for 3-5 minutes or until there is no liquid, but don't over cook them so they become spongey. Gross.


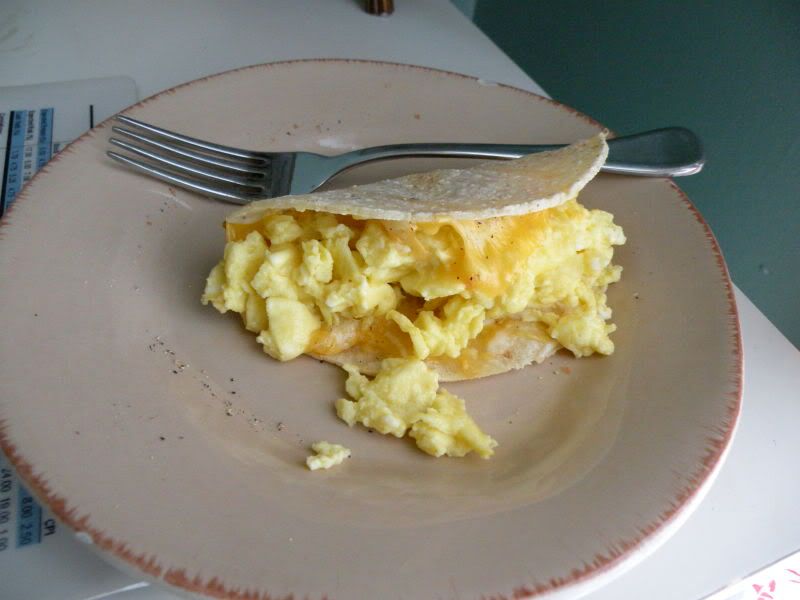
Eat solo, or put in a tortilla with melted cheese!

Thursday, 16 April 2009

Curried Mussels with Spiced Bacon

Yeah, so bacon is pretty much my favorite thing to add to other things, and I was feeling like curried mussels a few nights ago. Here are the results, which turned out very well:

2 lbs of mussels (normally that's what the bags weigh)
1/2 can of coconut milk (more if you want more broth -- I had some broth left over though, so 1/2 can should be plenty)
2 stalks of lemongrass
1/2 white onion
1 shallot, diced thin
3 cloves of garlic, minced
1 tsp minced ginger (more to taste)
white wine
6 slices of bacon
Curry Powder
Coriander

To make the broth, just saute the onion, garlic, shallots, lemongrass (remove the outer layers and chop big pieces of the pale yellow/white bulb area), and ginger in a wok or a deep saute/fry pan -- just get them to the point where they're fragrant, 2-3 minutes. Add the spices, cook for another minute, then add the coconut milk. Stir everything together, cook for another minute or so, and then taste to see what the spices are like -- I ended up adding about 1 tbs of curry powder...

Note on curry powder vs. paste: I used curry powder (yellow), but if you wanted to use paste, you could certainly do that as well -- I wanted to have a lighter curry taste since mussels are delicate, so that's why I opted for the powder. If you're using paste, add it before adding the coconut milk, and then cook the combined mixture a bit longer until you see the oil separating and coming to the top of the broth.

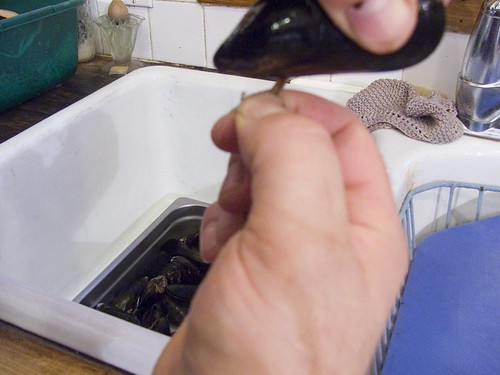
"De-bearding" mussels: Mussels are mostly farmed these days, which is great because they are very sustainable and there is little to no difference in taste between quality farm-raised mussels and wild ones. The farmers hang ropes seeded with mussels into the water, and then the mussels attach themselves via a strand of calcium coming from their shells -- this is the "beard", and you do not want to eat it.

This picture is not mine (got it here: http://www.flickr.com/photos/86571141@N00/81767631/), but it shows the beard and the method of removing it:

Anyway, as shown, you want to pull the beard towards the hinge end of the mussel, as this will prevent an untimely death by yanking the mussel from its shell. I always use a dry towel, as it gives a much better grip than your fingers, and some of the beards can be quite tough to remove. It took me about 15 minutes to de-beard 2 lbs. of mussels, though most of them were relatively clean... so plan ahead a bit on dinner time.

Also (important!)
, never eat any mussels that are open, have cracked/broken shells, or smell noticeably bad -- sometimes they are a little bit open at the ends, but if you tap on the shells or force them closed, they should hold tight... this indicates that the mussel is still alive and not a festering bacteria haven waiting to kill you.

Okay, now that's out of the way -- back to the recipe:

For the bacon, I cooked it on a sheet pan in a 350-degree oven for about 20 minutes. Just check on it -- when the tiny white bubbles are out in abundance, remove the bacon and dab it with a paper towel to remove most of the grease. I seasoned my bacon with curry powder and coriander before baking it, and it tasted wonderful... plus, the neon yellow bacon grease was kinda cool.

When the curry broth is combined and seasoned as you would like, add the mussels to the pan, then move them around in the pan with a spoon, making sure to coat them with the broth as much as possible. After they cook for a minute or so and the broth comes back up to temperature (might want to raise the heat a bit), add the wine (I used two big "glugs" of white wine), and cover the pan to help the mussels steam.

Mussels are done when they open completely -- you can check on them without disrupting the cooking process too much, but generally they will be done in 5-6 minutes of cook time. Any that aren't open all the way, cook a bit longer -- if they still do not open, then do not eat them.

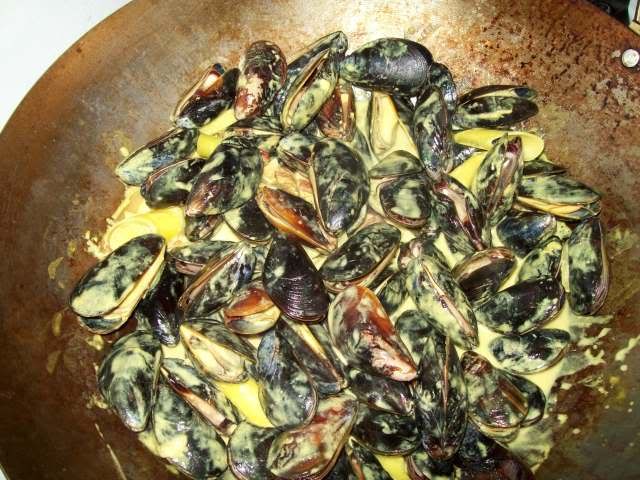
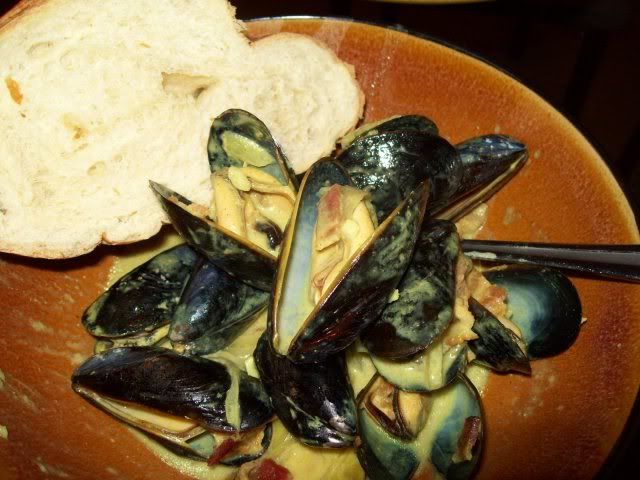
Here's what it looked like by the end (I added the bacon towards the end to keep it fairly crisp):


Serve with some crusty bread (or rice, if you're so inclined.. it is curry after all) and some nice white wine/prosecco/rice wine. In all, (not including de-bearding time), it took 20 minutes to make this meal and the total cost was about $10 -- the mussels were $7.98 for the bag at my fish market, and everything else was just veggies... very nice meal for that amount of cash if I do say so myself.

Viva la mussel!

Wednesday, 11 March 2009

Yay for you, Trader Joes.

Trader Joes has GF baking ish now. It all started with some pancake/ waffle mix (which I tried and it was very good! It can double as GF flour for cakes and cookies, too) and I noticed last week that they now have brownie mix.

I gave the brownies a shot- added some extra chocolate chips and walnuts, but it was still lacking in the taste department. Maybe it was because I used applesauce instead of oil, but there just wasn't a depth of flavor. They just weren't chocolately enough. I'm sure it could be remedied by adding more cocoa, and I think I will give that a try next time around.

They did have a really great, chewy texture. The edges got crispy and caramelized...the best part of a brownie in my opinion. And if you're like me, you will appreciate this brownie pan which can be found at Fredflare.com:

Monday, 23 February 2009

lobster

I have to cook a lobster dinner on Wednesday. It's something I've never done. Any tips or advice? I'm thinking of getting three pounds for three people and boiling.

Wednesday, 11 February 2009

Butternut Squash Soup

One quart of stock
Two smaller butternut squash - about 1 1/2 lbs. (cubed) [I recommend two smaller ones rather than one large one cuz their flavor is better when smaller]
One carrot (diced)
One celery stalk (diced)
One medium onion or leeks (diced)
2 Tbsp. Butter or olive oil
One bouquet garni (same as the potato-leek one)
1/2 c. cream or creme fraiche (optional)

1. Add the fat (butter or oil) to the soup pot. Add the diced veggies and sautee until they have softened (about 5 minutes).
2. Add the squash, stock and bouquet. Bring to a boil and let it roll for about 30 minutes or until the squash is soft enough to slide a fork in without resistance.
3. Again, you can either eat this as is or you can puree it. If pureed, return to the pot and add the cream if you desire. Serve as soon as possible.

Potato Leek Soup

A quart of stock
A pound of russet potatoes
A pound of leeks (one large or two smaller ones)
2 Tablespoons butter or olive oil
A bouquet garni [I use a coffee filter tied off with some twine]
Salt & Pepper
1/2 c. white wine (optional)
Cream or creme fraiche (optional)

For the bouquet:
2-4 Bay leaves
4 sprigs of thyme
some peppercorns

1. Melt the butter/add oil in the soup pot. Add cut up leeks - about 1" wide sliced in half so its not a bunch of leek tubes, rather inch-wide strips. Sautee the leeks until wilted - about 5 minutes. If you are using the wine, add it and bring to a boil until the alcohol is cooked off.
2. Add the stock and bouquet and cut-up potatoes and salt/pepper. Bring to a boil.
3. When the potatoes are cooked all the way through (about 20 minutes), drop the heat. Remove the bouquet.
4. Here is where you can either eat it here if you want a "rustic" soup experience, or, if you have access to a blender, pour in the potatoes and leeks and some broth and puree the whole mess (probably in stages and dont forget to hold down the lid!).
5. Return the puree to the pot and add the cream if you want it a rich soup. Otherwise you are good to go.