Thursday 30 July 2009

Turmeric-Paprika Pork Chops w/Couscous and Veggies

This was just a dinner I made randomly and it turned out really well, so I wanted to share it. Didn't take pictures of the cooking, just the final result... it's fairly simple anyway.

Pork Chops:

I just seasoned them with turmeric (mostly for color, but it imparts some flavor too), smoked Spanish paprika (hot style) aka "pimenton", a bit of toasted cumin and coriander, garlic powder, and Kosher salt/pepper. Just pat the spices on, don't rub it (that goes for all spice "rubs" BTW). Cook the chops in a pan with some olive oil over med-high heat for approximately 4-5 minutes per side, until they're firm to the touch. If you're suspicious of doneness and can't tell by touch, cut a small slice in the middle to see if it's still pink. It's worth mentioning that nobody's gotten trichynosis from undercooked pork in nearly 100 years, so I don't mind a little bit of pink in my pork (makes it jucier). I also suggest using an oven-safe pan to cook the pork, as you might want to stick it in the oven to finish if you're thinking it's underdone and don't want to burn the outside... this is especially true of thick-cut pork chops, but I just used standard boneless.

Couscous w/Orange Bell Pepper and Onion Saute:

I used a boxed organic couscous (forget the brand) that essentially just requires that you mix the couscous into boiling broth/water (along with olive oil, butter, and/or salt, if desired), cover, remove from heat, and let sit for 5 minutes. I used some leftover homemade chicken broth I had in the fridge, salt, and a bit of olive oil. When it's sat long enough, just fluff it with a fork. This isn't the traditional/bad-ass way of making couscous (it's traditionally steamed), but it comes out tasting fine and is a VERY easy whole-grain to prepare along with practically any dish.

Then I topped it with some sliced orange bell peppers and onions that were sauteed with some minced garlic and simply seasoned with salt and pepper.

Asparagus:

This is how I cook pretty much every piece of asparagus in my house. Blanch the asparagus in generously-salted boiling water after trimming off approximately 4" of stalk. Let it go for about 2 minutes or until you get to its desired doneness (I like mine crunchy still) -- remove it to an ice bath (ice + water + salt) and let it cool so it stops cooking. When you're ready to use it, either serve it cold or put it in a saute pan with some butter (and garlic if you like) to heat it up and give it some nice flavor.

Here's the final product (2nd picture also features a Dogfish Head 90-Minute Imperial IPA, which is an absolutely AMAZING beer)... note the nice yellow color the turmeric imparts:


Thursday 23 July 2009

Apple Tarte Tatin

So this was basically my first time trying anything beyond a basic pie. I've made my own crust previously for a quiche, but had never made an entire semi-complicated pie from scratch before... was pretty proud of myself. I used Jacques Pepin's recipe in "Complete Techniques" (great book BTW) as a starting point but didn't follow it exactly. Here's the recipe/technique I used:

Apples:

6 Braeburn apples -- you could certainly use green apples, and they'd probably be a little crisper by the end, but I'm a red apple fan, and Braeburns don't have a ton of juice so it kept the crust nice and crispy.
1/3 C white sugar
1/2 stick of butter
Dash of cinnamon for seasoning

Slice the apples as thinly as you can while making sure they're complete cuts and fairly uniform. I slice the apples in half twice (along the core, then the remaining sides) and then use the flat cut side as a base for slicing. If you have a mandolin, do it that way and it will be faster. Melt the butter until it is foaming, then add the apples, then the sugar.


You only want to cook the apples enough for them to be coated in the sugar/butter mix and slightly tender... they have nearly 45 minutes of cooking ahead of them, so don't get them mushy. I sprinkled a little cinnamon over them after removing them from the pan to a cookie sheet lined with wax paper. you want the apples to be at least room temperature (or colder) before trying to arrange them. Make the caramel while the apples are cooling to save time.

Caramel:

1/3 C sugar
Water

This is where I diverged from Jacque's recipe a bit... instead of using simply water and sugar for the caramel, I used the remaining cooking liquid from the apples, which is a nice sweet apple butter that I thought would add some additional apple flavor. So anyway, I added the sugar all at once to the remaining juices and then added water periodically when I noticed it reducing too quickly.

Cook the mixture while stirring constantly to avoid clumping or burning. The mixture will look like this for quite a while (I had it on med-low heat, but it would go faster over medium):


Keep cooking it (raise the heat if you want to, but be careful not to go too crazy) until you get a nice golden brown like this:


After cooling the apples, pour the hot caramel into the pie plate, moving it around to distribute it as well as you can around the bottom of the plate and a bit of the sides. Now, arrange the slices as precisely as you can on the pie plate -- remember that the bottom will the be the top, since tarte tatin is an upside-down tart, so the curved part of the apples should be on the bottom. Start from the center and arrange them in an overlapping circular pattern, working your way towards the outside of the pie plate. Once you reach the edge, start from the middle again. Any small or broken pieces of apples can be effectively hidden in the middle of the tarte, so save the nicest ones for the first layer on the bottom and for the sides. Anyway, this is what mine looked like after loading it up with all 6 apples and the pieces:


The apple and caramel portion is ready to go, now onto the crust:

Crust:

2 C AP flour
1.5 sticks of butter (6 oz.), cold and cut into small pieces... or you could use half and half and use lard or vegetable shortening
1/4 tsp salt
1/2 tsp sugar
1/3 C cold water (amount varies)

Add the butter to the flour (which should be tossed with the salt/sugar) and either use a pastry cutter or "pinch" the butter winto the flour until it resembles corn meal. If there are some larger butter chunks left, that's no problem.. just makes it flakier.


Add the water bit by bit until you can softly knead it into a workable ball. KEep oin mind that the less water you use, the softer the crust will be, as water and additional kneading develops gluten. Flour a counter/cutting board and roll the ball out, turning 1/4 turn each time. Once it's about 1/2" thick or so, place the crust on top of the pie plate and pinch the edges to seal -- make sure to push the dough down onto the apples so there isn't an air pocket before sealing. Trim the dough (I used a pizza cutter) so it just hangs over the side of the pie plate.

Brush the crust with an egg yolk and cook in a pre-heated 400-degree oven for approximately 45 minutes. Keep an eye on it late in the cooking, as it could possibly boil out all your oven or burn in a matter of minutes. When oyu take it out, let it sit for about 5 minutes, but remove it fairly quickly, as you don't want the caramel to re-solidify. Place a platter on top of the crust and flip the pie plate over. I managed to flip this one with only a single apple falling off, which I was extremely happy about. Here's what it looks like all done and steamy:


Thursday 16 July 2009

Quinoa Salad

Quick lunch or side dish that can be served hot or cold. Keeps well in the fridge :) This is a super basic recipe that is very forgiving to all sorts of tasty ad-ins: kalamata olives, chopped walnuts, sun dried tomatoes, artichoke hearts, hearts of palm, etc.

1.5 cups quinoa
2 cups Kitchen Basics veggie stock
2 roughly chopped ribs celery
1 can of Trader Joe's Tongol tuna
Handful of golden raisins
1 tsp Herbs de Provence
1 TBP olive oil
1/2 tsp garlic powder
1/2 tsp onion powder
1/2 teaspoon of balsalmic vinegar
Healthy grinds of sea salt + pepper to taste

Pour your stock into a saucepan, add the quinoa, raisins, herbs, onion/garlic, vinegar, oil, salt/pepper to taste. Give it a quick stir, turn the burner on medium until it barely reaches a boil, reduce heat to simmer, cover and wait 10-15 minutes or until almost all of the liquid has soaked in.

After the elapsed time, chuck in your celery, turn off the heat and put the cover back on. Keep covered until all the liquid has been absorbed and the celery is fork tender (don't over cook!! its better to have very crunchy celery than mushy!)

At this point you can either throw the tuna in and serve warm or take the pot off the stove, transfer to a large bowl and refrigerate until cold. Once cold, throw the tuna in.

Garnish with fresh basil.

Suck It, General Mills.


Maybe you have wandered around in the cereal aisle lately and discovered that Chex now has several "Gluten Free" varieties. Well, I have a bone(r) to pick with you, General Mills and many other manufacturers who seem to have it in for my intenstinal health.

To be truly gluten free, you must manufacture in a dedicated GF plant where there is no chance of cross contamination. The finished product must be routinely checked for gluten.

"Gluten Free!" has become the latest catch phrase that has been misunderstood as a health fad. This isn't some low-carb, vanity diet that will eventually fizzle out and die. This is so we don't wind up shitting into a colostomy bag because we got colon cancer due to eroding our digestive tract. There is a big different there.

Big businesses aren't invested in our health, they are invested in our pockets and tapping into a previously ignored segment of the population who is used to paying insanely high prices for specialty foods (seriously, I've seen $16 for 2 premade GF pizza crusts..)

In conclusion, you, General Mills can suck it and suck it hard. Or soft, whichever you prefer as long as you suck it.

Wednesday 8 July 2009

Argentine Empanadas

So I'm completely in love with making my own dough lately. It all started with the Chinese dumplings, then it moved to Southern biscuits... but now I'm on the empanadas hard. Here's the recipe I used for my latest batch, which had spicy beef picadillo, potatoes, and goat cheese (amongst other things). In all, it takes a few hours, but you get a bunch of them and if you tag-team with someone else, I'm sure it would go much faster. You can use almost whatever you want in empanadas... Argentine food is famous for its Italian influences, but you can pretty much put anything you like inside these delicious little pastry packets. I made some vegetarian ones with Italian vegetables, and I plan to make some with chorizo and potatoes soon.

Dough:

1.5 C All-Purpose Flour
4 tbs fat (I used all butter in one batch, half lard/half butter in another)
1 egg yolk
1/2 tsp salt (I used Kosher)
~3/4 C milk

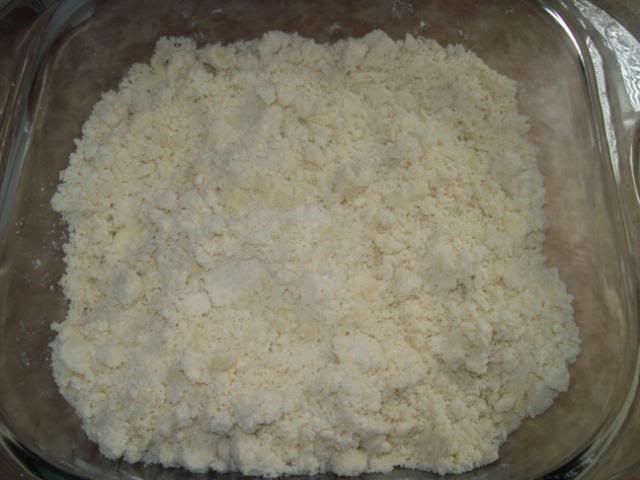
The easiest way to do this is in a food processor -- just pulse the flour and the fat together until it looks like cornmeal.. if you've made biscuits or pie crust, you're familiar with this. Add the egg yolk and a bit of milk then pulse to combine. Keep adding milk in small increments while pulsing until the dough begins to pull away. Once it will hold together when you lightly knead it, it's ready to go. Form the dough into 2 or 3 thick discs and chill in the fridge for 30 minutes or until you need it. Cover it with plastic wrap or in a covered container if you plan to leave it for longer than a few hours though.

Note on this recipe: normally empanada dough doesn't have milk in it, but apparently they make them this way in the Mendoza region of Argentina and it makes a fluffier final product. I decided to try it out and really liked the texture. You could also use water, which I might do for my next batch to see if I can get some fairly crispy as a change of pace.

Roll out the dough as thinly as you can (right before it's transparent, about 1 mm) and cut out rounds with the instrument of your choice. I used an oatmeal canister top, but it just depends on what size you want. Re-roll the scraps until you have one final awkward looking one remaining, which you will eat as soon as it comes out of the oven. Chill the dough rounds until ready to use.. sooner the better though, as you don't want it to get dry.

Filling:

1 lb ground beef
2 white onions, diced finely
1 bunch green onions
4 potatoes, peeled then boiled in salted water until fork tender
3-4 garlic cloves, minced
2 tbs ground chile powder (chile molido)
1 tbs cumin, preferably whole toasted and then ground
Fresh oregano and cilantro, chopped
Smoked paprika to taste (if you have it.. I didn't, unfortunately)
Salt/Black pepper

Cook the onions until translucent over medium heat (salt them to facilitate sweating), then add the beef, smashing/stirring it with a spatula to break it in to small pieces. Add the garlic when the beef is about halfway done to prevent burning, then add the spices and finish cooking the beef. Remove the beef mixture with a slotted spoon and combine with the potatoes, which should be diced up small and then mashed in with the beef. Add diced green onions, cilantro, and oregano (to taste). Put everything in the fridge to chill after tasting for spice levels (I added more salt due to the potatoes and also some extra chile molido).
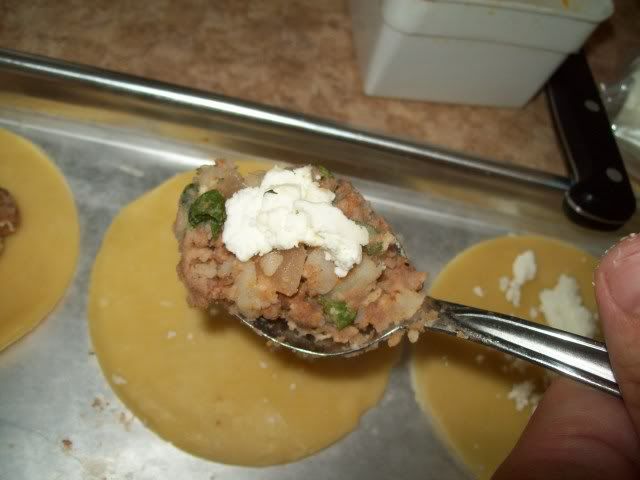
Assembly:

Spoon a medium spoonful of filling into the center of your dough. I made this batch with goat cheese stuffed inside, so I did about 50% here with the goat cheese loaded in the spoonful:


Then topped it off with a packed disc of filling to prevent the cheese from oozing all over the place:


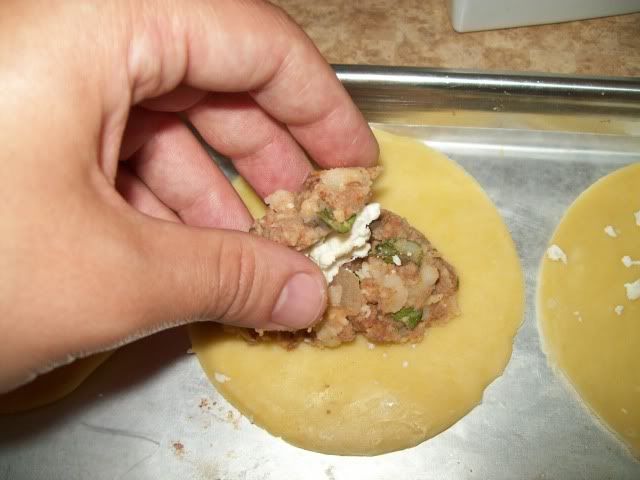
Now here's the fun part. I made an exceedingly crappy video trying to show my technique, but it was tough to do while holding the camera. Anyway, you want to brush the edge of half the dough with egg white, basically pinch together the two ends of the dough (like a taco), then close it up from edge to edge, being careful of filling getting in between the dry dough and the egg white side. Then you should do another seal with the side of your hand as seen here -- this creates a nice bump as well as a bigger rim, making an ornate sealing method easier.


I fold the ends over and then pinch the dough to seal it and make a nice looking empanada -- you could also just use the tines of a fork or fold it.. whatever works and keeps it sealed:


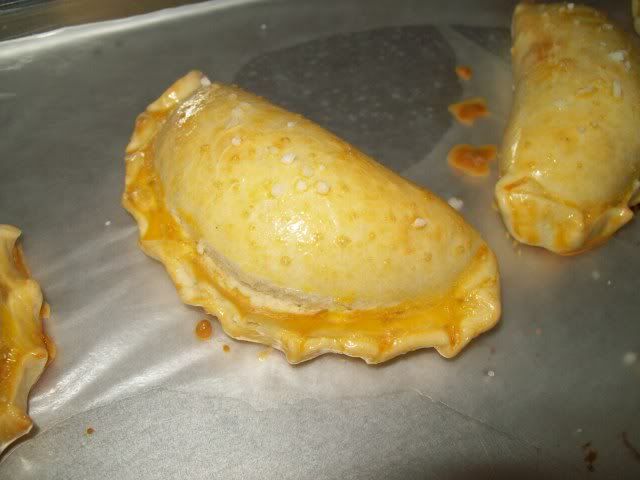
Let the empanadas rest in the fridge for another 30 minutes before baking. Pre-heat your oven to 350 degrees, then brush the empanadas with egg yolk and sprinkle with salt (again, Kosher or sea salt is much better for this kind of thing). I did this on a wax paper lined sheet pan that would be used to bake them as wlel -- parchment paper is probably better, but I didn't have any:


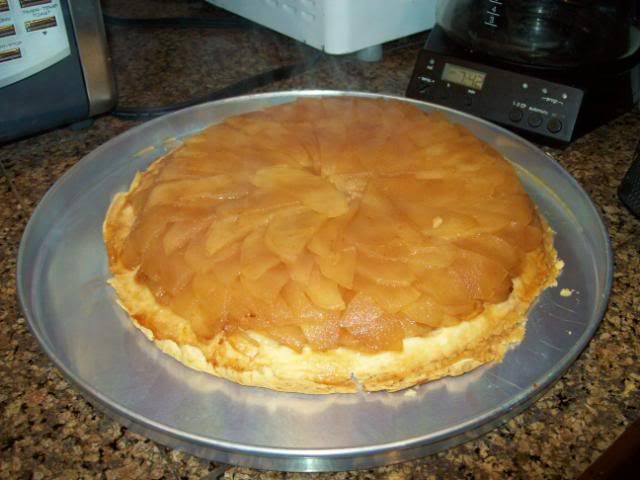
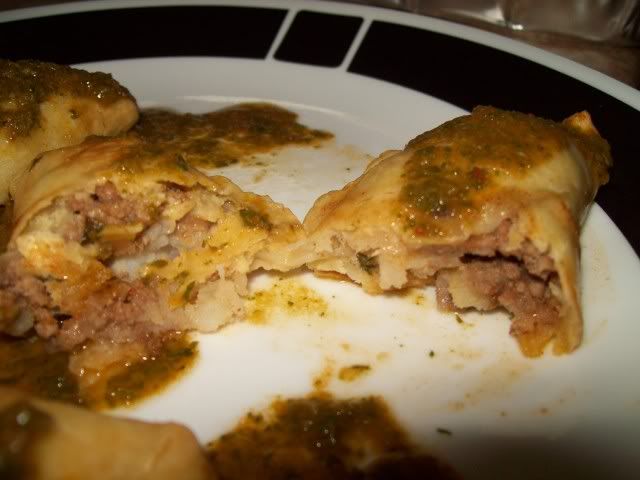
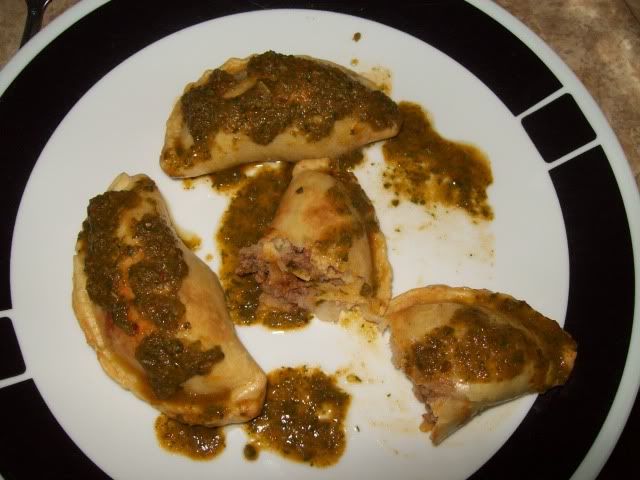
Bake at 350 for approximately 20 minutes. But really, just wait until they're slightly brown and totally firm and you're good to go.. I think mine took 24 minutes. Yummy:


Enjoy with a quick blender chimichurri with whatever fresh herbs you have on hand (basil, parsley, oregano, cilantro all work well), olive oil, vinegar (white or balsamic works), garlic, onions (if desired.. they'll be raw white onions), chile powder, and salt/pepper.


I'll probably post the technique video even though it sucks. Or maybe I'll just make more of these delicious little bastards and shoot another one. Enjoy!